How to Use Stage Testing for Immediate Release Products
Step 1: Select Stage Testing Immediate Release
From the Dissolution ribbon, open Stage Testing and select Immediate Release.
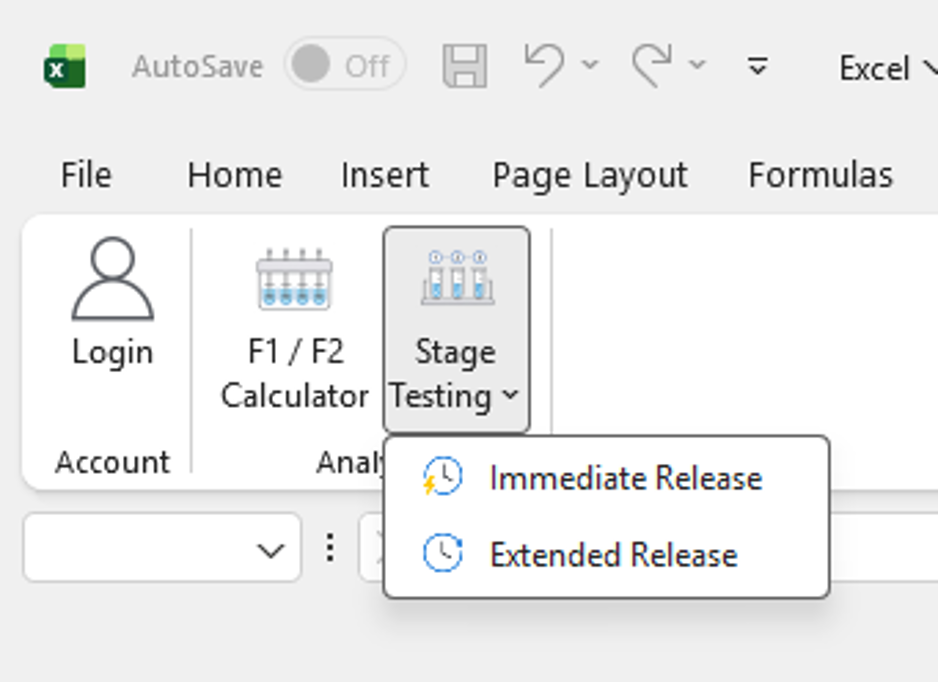
Open Stage Testing from the Dissolution ribbon and choose Immediate Release.
Step 2: Complete the input table setup form
Complete all required fields in the setup form by selecting the appropriate values for your test, then click OK. If any required information is missing, follow the prompt to complete the applicable field before continuing.
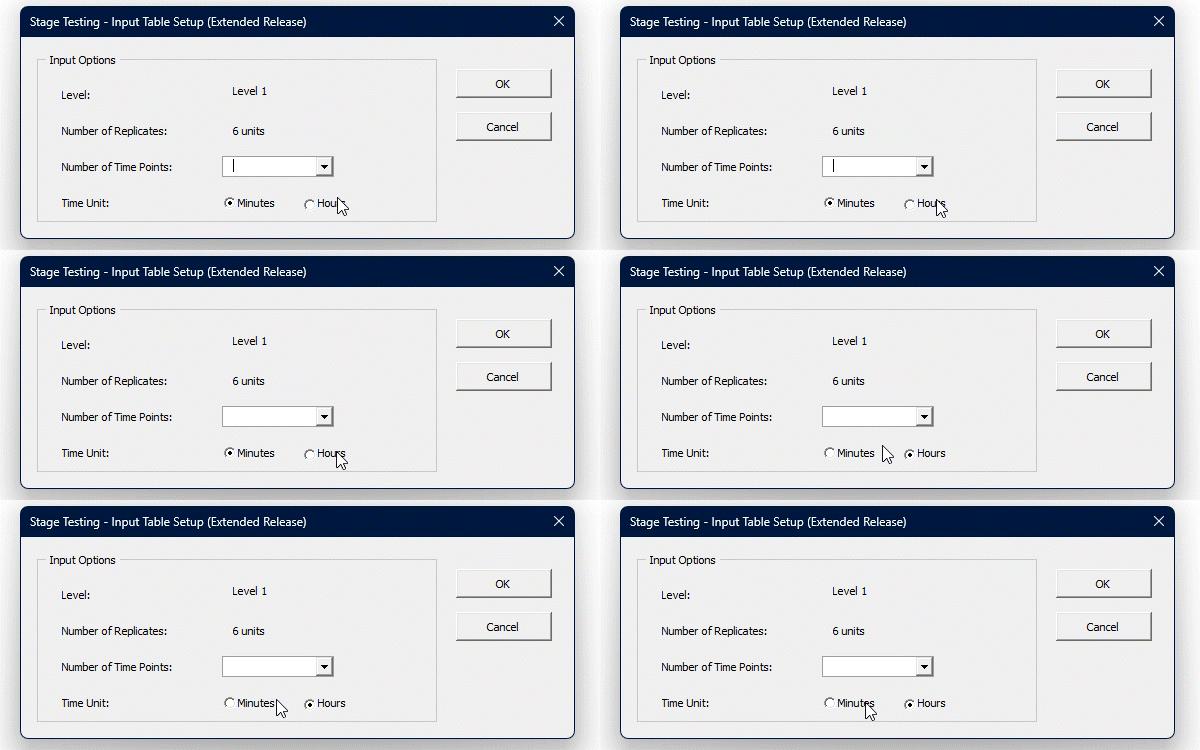
Complete the setup selections, then click OK.
Step 3: Enter the Stage Testing inputs
Enter the Dataset Name and Description, when applicable. Enter the dissolution values and Q values only in the designated input cells highlighted in yellow for the current stage.
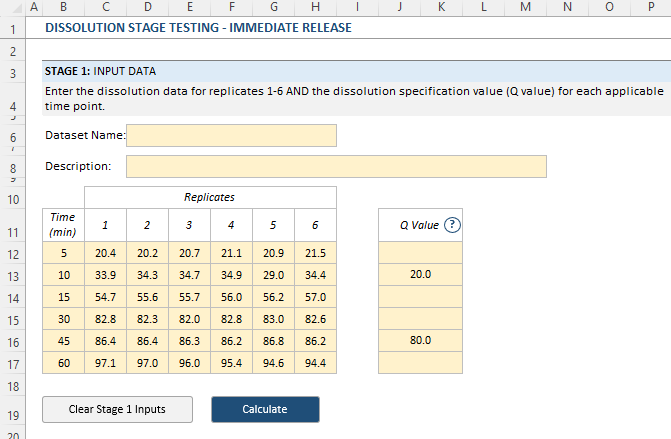
Enter the current-stage inputs only in the designated yellow cells.
Step 4: Calculate the current stage
After completing the required inputs, click Calculate. If a validation message appears, correct the identified input and click Calculate again.
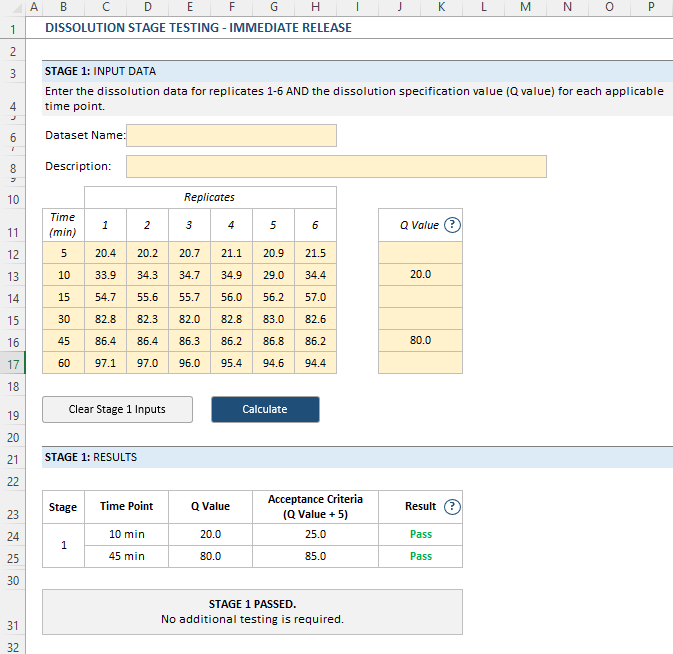
Calculate after all required inputs are complete.
Step 5: Review the stage results
The results table will show PASS/FAIL status. The summary message below the results table indicates whether the current stage requirements were met or whether additional testing is required.

Review each time point, the PASS/FAIL result, and the summary message.
Step 6: Proceed to the next stage, if required
If the current stage requirements are not met, click Proceed to Stage 2 to continue testing with the required additional units. Enter the additional dissolution data and calculate the next stage. Repeat this process until the applicable stage requirements are met or Stage 3 testing is completed.
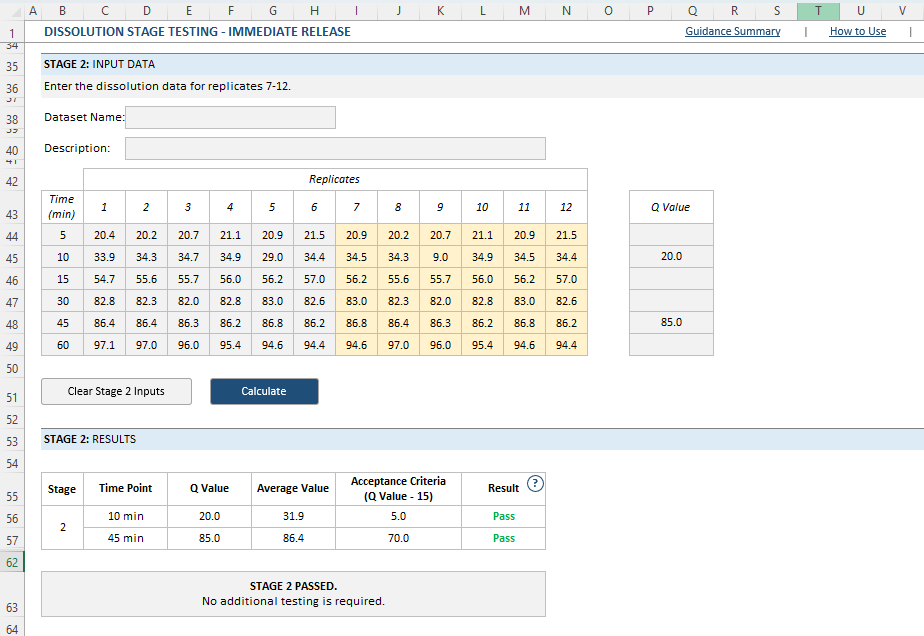
If required, proceed to the next stage and enter the additional dissolution data.